I initially found it difficult to implement complex interfaces between Business Central and Xamarin mobile apps by using ODATAv4 and API Pages.
Luckily Busines Central offers plenty of solutions to implement interfaces and both OData Bound and Unbound Actions are really awesome features.
One of common scenario I have to deal with is a mobile app showing sales prices, discounts and availability for a specific item for a customer.
In this situation, I prefer to leave to Business Central the logic to determine the right price and discount for the item because often this evaluation involves a custom logic implemented on BC side and the final price is not obtained as it would be with the standard.
Moreover with BC v16 a new logic and interface for price evaluation has been introduced and the “Sales Price” is now obsolete:
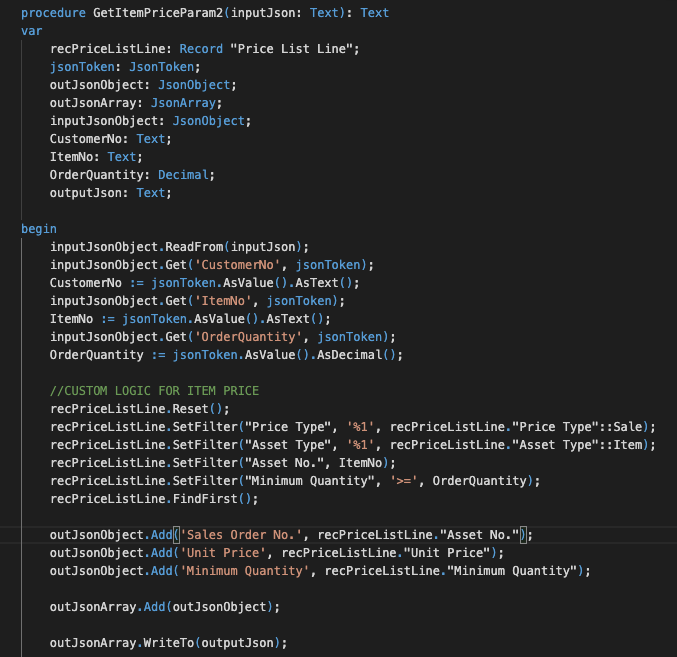
This is the sample codeunit with two different type of parameters.
In the first procedure I pass a generic JSON and then I deserialise it.
In the second procedure I pass direct parameters.
STEP 2: MAP THE CODEUNIT IN WEB SERVICES
The configuration may be managed via WSPublishing.xml.
STEP 3: TEST THE API WITH INSOMNIA
The POST for the two procedures:
The company is passed as an header parameters. May be passed in the URL too but I on my opinion the header solution is easier for Xamarin Forms implementation.
STEP 4: THE XAMARIN HTTP REQUEST
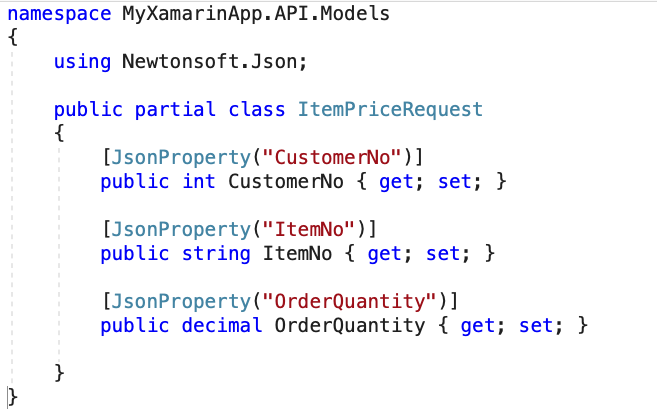
The Json input class:
This is the Business central JSON mapped in the C# class:
The Xamarin Forms Request with the company passed as http header.
REFERENCES
Creating and Interacting with an OData V4 Unbound Action
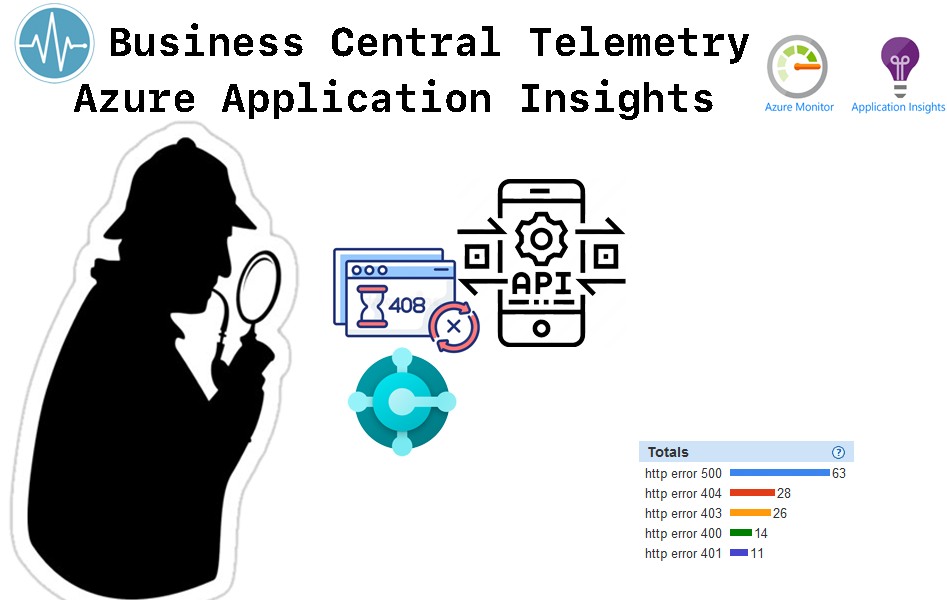
Telemetry is a magic to tool monitor Business Central. It allows to investigate API slowdown reports and claims of users.
Users may have the incorrect perception that SaaS and Premise environments have reliability problems.
Fortunately, Telemetry is a good solution to make it clear whether a tenant is instead stable.
Telemetry allows to have an indisputable tool to monitor HTTP error occurred during API requests (eg: errors 429, 500, 404 and so on).
The final report of this tutorial outputs, for each API requests, all the information needed to investigate slowdown and outages.
These telemetry fields are all it needs to check health and status: http status code, the execution time, the sql rows and executes and the endpoint.
It’s just disappointing the fact only BC16+ (thx Kennie Nybo Pontoppidan corrected my mistake about the version) supports telemetry on Web Services and API, as documented:
Log to Azure Portal and create a new “Application Insights”. This operation is just as simple as in pictures.
Please check the “Istrumentation Key” and the “Connection String” values because they are needed when configuring Telemetry on Business Central tenants.
ENABLE TELEMETRY ON BUSINESS CENTRAL SAAS
To enable Telemetry I access the Admin Center of Business Central Saas. The admin center is accessible from this url:
The final result is just what we need to investigate on HTTP outages:
HOW TO QUERY TELEMETRY DATA WITH POWERSHELL
On the “API Access” blade click the “Create API Key” button. Copy the generated and saved it because it will never ever be accessible again. The “Application ID” will be used to for PowerShell.
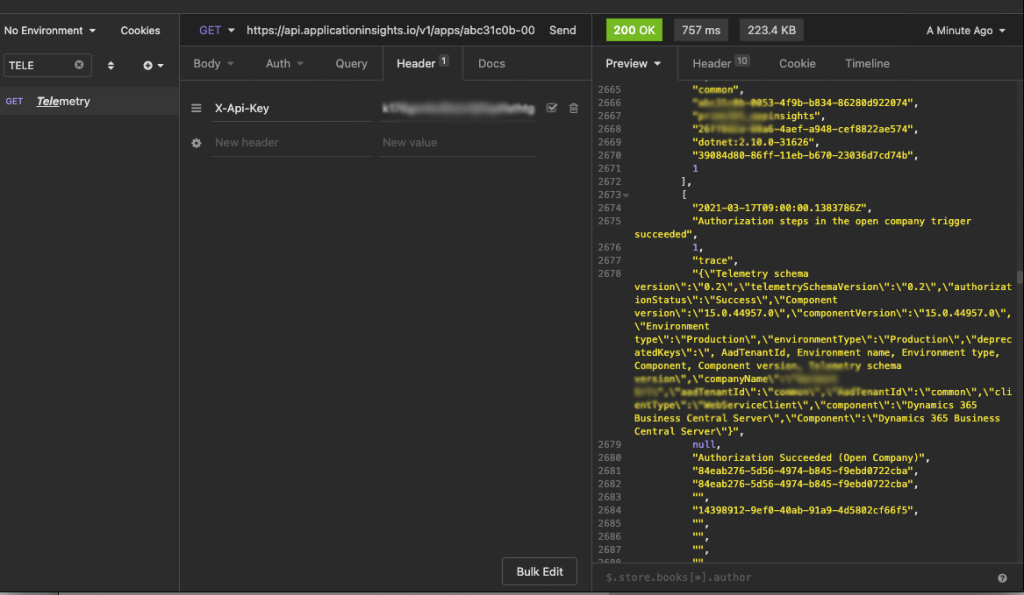
I find it easy to test with Insomia. The request is:
GET https://api.applicationinsights.io/v1/apps/{app-id}/query?query=
“Dynamics 365 Business Central: handling telemetry with Azure Application Insights” and “Using Powershell to retrieve your Dynamics 365 Business Central telemetry” by Stefano Demiliani:
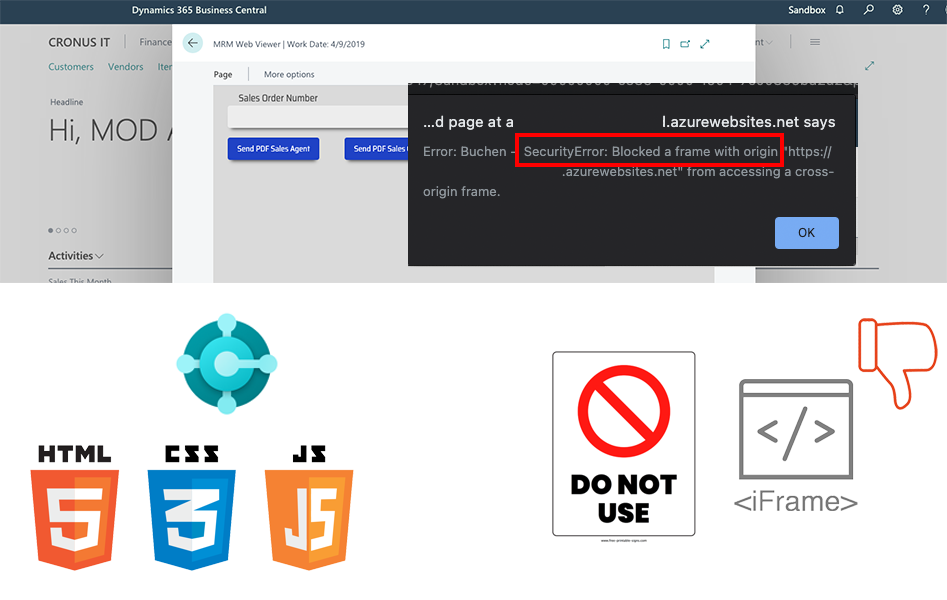
Most of Business Central Control AddIns sample I found on the internet mostly uses the <IFRAME> to embed an external webpage or website inside Business Central page.
This solution is pretty common because it allows to easily and quickly embed the page just by using the <iframe> tag.
But <iframes> have a major problem. They allow cross site javascript scripting between the parent and the iframe page but they does not allow the scripting on the other direction. This is prevented for security reason, as often happens with iframes.
On the past cross scripting was used to get private information, it was enough just to embed any bank website inside an iframe to access all of its information from the parent page. So, just embedding the login page in an iframe, allowed malicious users to access credentials entered in the login page.
This means that, by using iframes, the browser JavaScript’s engine does not allow cross site scripting.
In my previous article I used in fact a different approach to implement a control addin.
“Control Add In” in Business Central: a responsive web app fully integrated in web client and mobile app:
Control AddIns looks like a fantastic solution to integrate a Business Central page with an external responsive Web Application.
The responsive website automatically adapts to the layout thus is fully working both on web client and mobile app for tablets and mobile phones.
The integration is pretty simple, in my scenario I a page includes a control AddIn that embeds a single WEB page. The page exchanges data with a Web Page. The Web Page is responsive and based on a a basic Azure Function.
The control addin allows to easily implement a clean solution that integrates business central pages with external websites.
As shown in figure the business control page implements TRIGGERS, the control addin implements the INTERFACE of the common procedures and events. The WebSite shares those procedures and events with the business central page.
This allow a two ways binding between those two components: the webpage calls the procedures declared in the control add in and implemented in the trigger page.
THE CONTROL ADDIN
The Control AddIn is the most important part of the project and is basically a gateway between the Business Page and the WebSite.
Inside the control add is specified the “StartupScript” which is a special script that the web client calls once the page is loaded.
THE “STARTUP SCRIPT”
The startup script is a normal JavaScript, the magic happens with this method: Microsoft.Dynamics.NAV.InvokeExtensibilityMethod().
In this script is possibile to invoke extensibility (CallBack methods),
What is InvokeExtensibilityMethod… As from official microsoft documentation: “InvokeExtensibilityMethod Invokes an AL trigger on the Dynamics 365 Business Central service on the page that contains the control add-in”
This file acts as “interface” between those two components: the BC page and the WebApp.
Here i declared events and procedures that are “shared” between the control addin and the page:
THE “SCRIPTS” SECTION
The Scripts property can reference both external and local scripts. I added both my local script and the external knockout library.
The knockout library allows me to use later on this way to load the external page: $.ajax({ url: url, xhrFields: { withCredentials: true } )).done(function(data) { $(“#controlAddIn).text(data); });
The local script contains a CallJavaScript method. This method is declared in the previous “StartupScript” and in consequence is accessible from the Business Central Page as I will describe later. This method is called in my webpage to raise events and call a trigger in the bc page.
THE “PAGE”
The control add-in is placed in the page.
There are two triggers in the page.
Those two triggers have the same signature as in the control add-in.
THE AZURE FUNCTION
The Azure Function returns an HTML5 page.
It contains three content files , those file are read, combined and sent back as an http response.
The interesting part is in the javascript that is called on the OnClick Event of the button.
The javascript function invokes PostToBc() and consequently the trigger in bc is raised.
IFRAME PROBLEMS
As I described on my other article, the iframe solution is not really the best one because this piece of code:
Since I am very lazy and I didn’t find any AL code generator I decided to develop it on my own.
My app gets a JSON file as input and, for each entity present, it automatically generates three files :
1) the AL table ;
2) the AL page ;
3) the AL API page ;
The AL code is SaaS/Cloud ready (I’m not sure if it works on OnPremise, but it should) . It is targeting the current Business Central version : 17.2. I am planning to migrate it as a Visual Studio extension soon.
It’s really simple to use, you have a demo video below.
EXECUTABLE
If you don’t want to compile the VS2019 solution you can get the application executable from here:
Good news: the medieval webkey authentication for Business Central API has finally been deprecated.
In this first article I presented a little overview of the secure and modern OAuth protocol with a “delegated permission” sample.
In this article I describe an “Application permissions” implementation for an application that runs as a background service or daemon without a signed-in user. I am going to describe how I refactored an existing Xamarin mobile application that is currently directly getting and posting data to Business Central APIs.
IT’S TIME TO MOVE TO AZURE
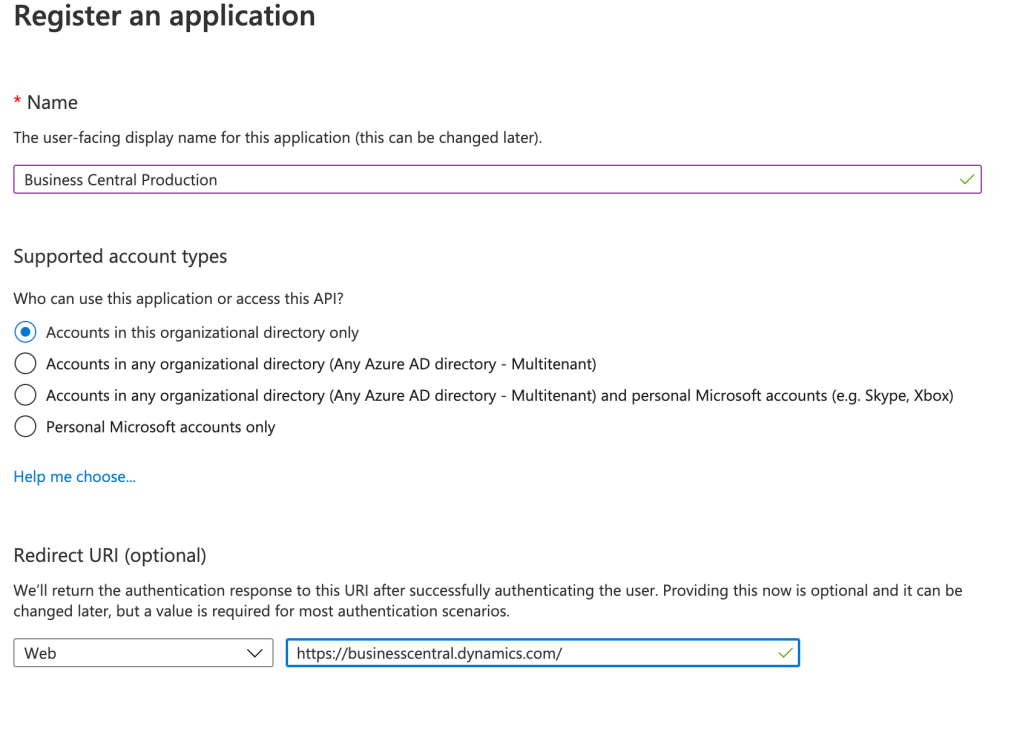
Login in Azure Portal https://portal.azure.com/ , go to “All Services”, search “App Registration” and select “App registrations” list item.
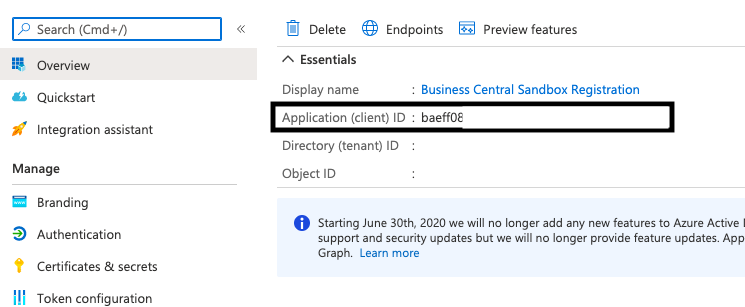
Note down the “Application (client) ID” GUID, this is the “CLIENT ID” we are going to use in Insomia.
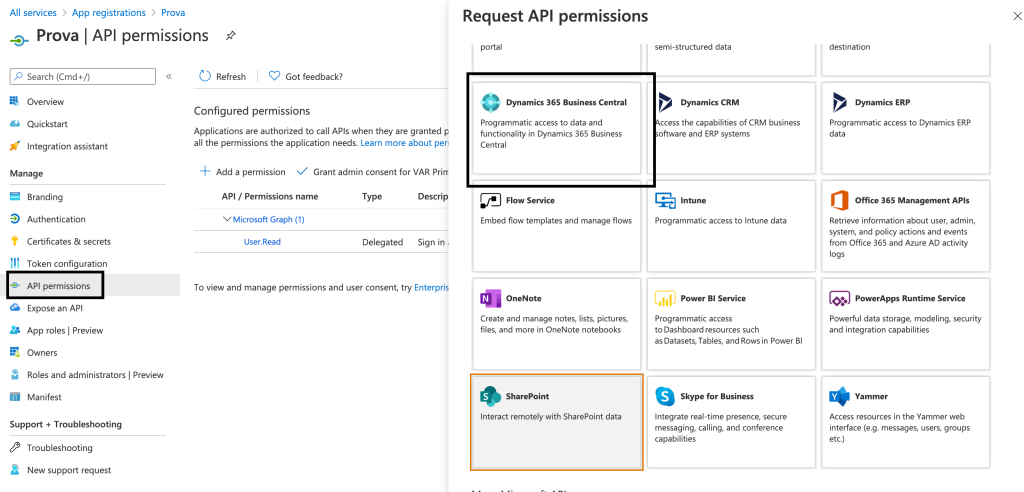
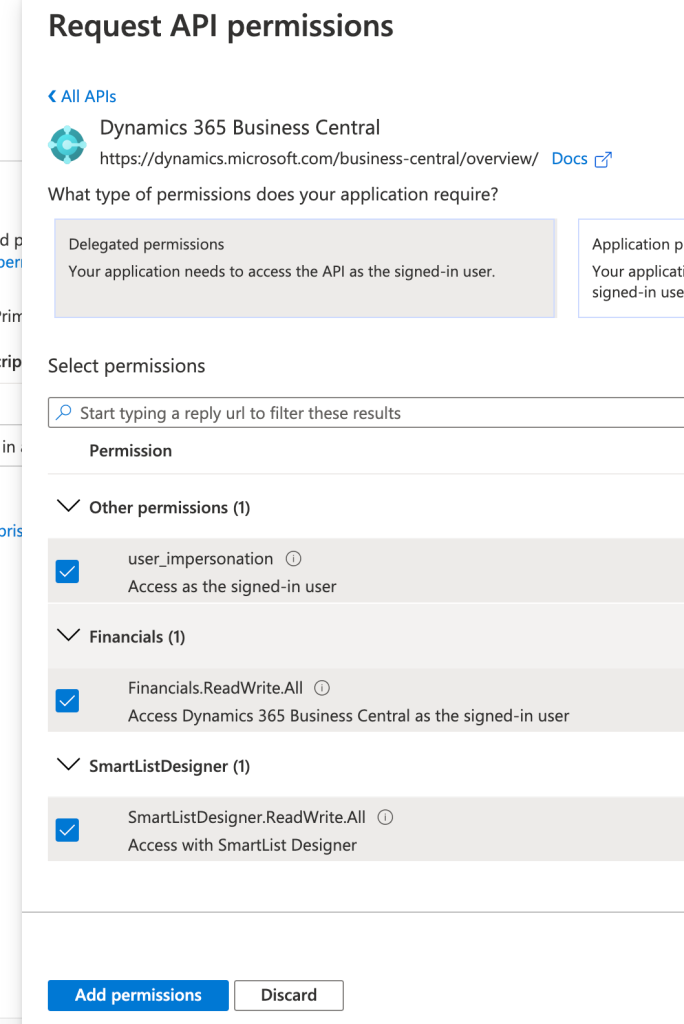
Select “API permission” blade,
Configure as in picture, this time we are going to use a different kind of permissions: “Application permission”.
Go the “Certificate and secrets” blade.
Add a new “Client secret”
The “Client secret” and “Secret ID” will be generated,
Please notice that the “Client secret” is shown in clear text ONLY after the first generation and it will NEVER EVER be shown again. If lost you will need to generate a new one. There is not way to recover an existing “Client secret”.
Copy the “Value”, we are going to use it in Insomia as “CLIENT SECRET”.
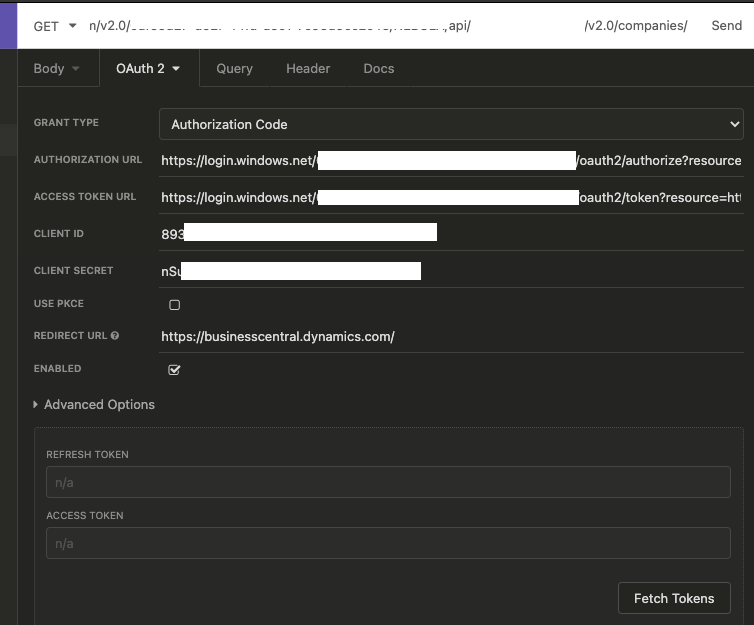
TEST WITH INSOMNIA
Here are all mandatory parameters to make an OATH request:
Token-Name: Give the appropriate Token Name Grant Type: Authorization Code
Good news: the medieval webkey authentication for Business Central API has finally been deprecated.
In this first article I am going to present a little overview of the secure and modern OAuth protocol with a “delegated permission” sample.
In next article I will describe an “Application permissions” implementation for an application that runs as a background service or daemon without a signed-in user. I am going to describe how I refactored an existing Xamarin mobile application that is currently directly getting and posting data to Business Central APIs.
IT’S TIME TO MOVE TO AZURE
Login in Azure Portal https://portal.azure.com/ , go to “All Services”, search “App Registration” and select “App registrations” list item.
Note down the “Application (client) ID” GUID, this is the “CLIENT ID” we are going to use in Insomia.
Select “API permission” blade,
Configure as in picture.
Go the “Certificate and secrets” blade.
Add a new “Client secret”
The “Client secret” and “Secret ID” will be generated,
Please notice that the “Client secret” is shown in clear text ONLY after the first generation and it will NEVER EVER be shown again. If lost you will need to generate a new one. There is not way to recover an existing “Client secret”.
Copy the “Value”, we are going to use it in Insomia as “CLIENT SECRET”.
TEST WITH INSOMNIA
Here are all mandatory parameters to make an OATH request:
Token-Name: Give the appropriate Token Name Grant Type: Authorization Code
For every Business Central customer I have to store Lat and Lng coordinates.
Starting form the customer full address, the coordinates are obtained by using Geolocation and Reverse Geolocation APIs of Azure Maps.
The coordinates are finally stored in the Customer table.
The whole procedure is implemented with a time triggered Azure Function acting as a scheduled orchestrator between Business Central API and Azure Maps API.
The next step implementation will automate this process by using webhooks: with this solution Business Central notifies the Azure Function every time a customer entity is updated and the azure function automatically and immediately update the coordinates.
ACTIVATE AND CONFIGURE AZURE MAPS ON AZURE
Login in Azure Portal and create a new source.
After resource is created just grab the primary key from “Authentication” blade.
TEST AZURE MAPS WITH INSOMNIA
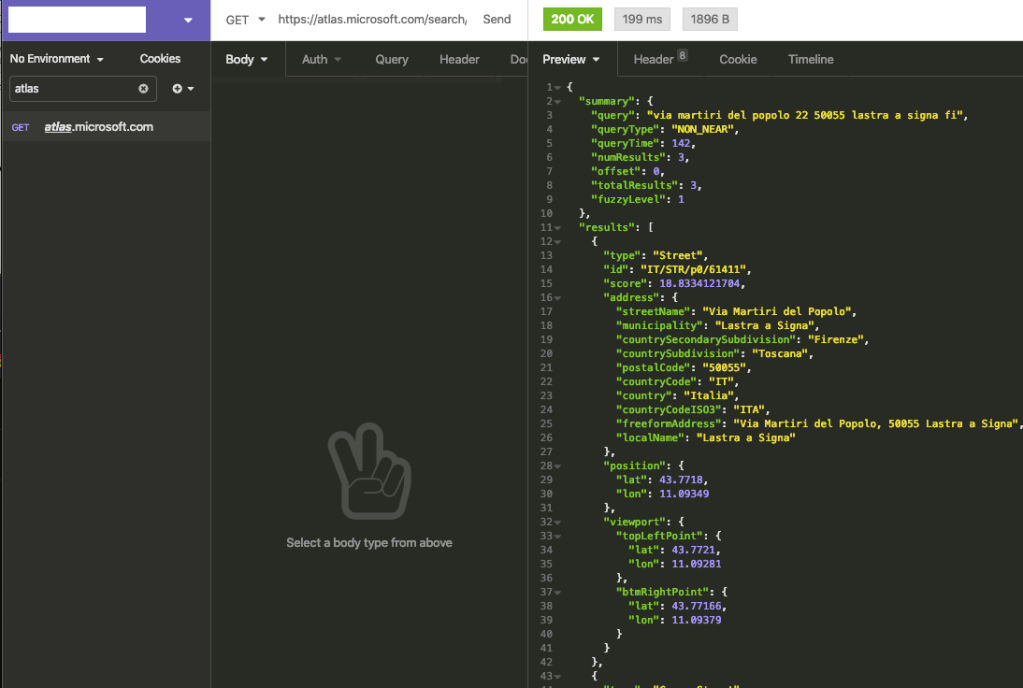
The rest call to get the address’s coordinates is pretty simple:
The JSON contains the coordinates of given address.
AZURE FUNCTION
The Azure function ProcessCustomers downloads a list of customers by using an API. For each customer it queries Azure Map service to get the lat and lon coordinates from the given address.
First it gets the list of customers by using a custom API and deserialize it.
The Customers.cs contains the business central Customer domain class converted in C# class.
Azure Map API services are used to get the lat and lon coordinates.
The full address is composed by formatting the business central address fields to obtain an Azure Map compliant address.
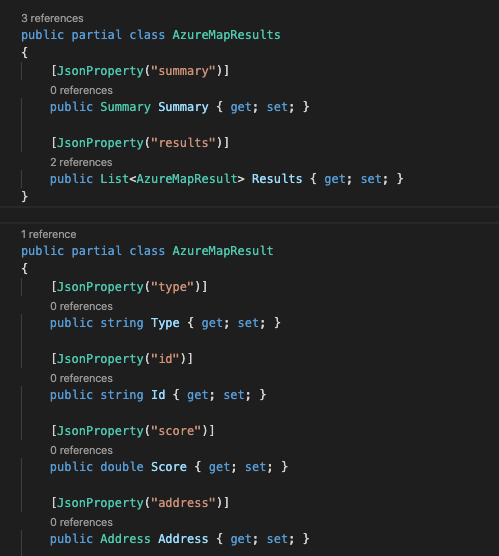
The Azure Map returns a JSON as represented in AzureMapResults.cs class file.
This is a typical json as returned from Azure Maps services:
The coordinates are updated in Business Central by using an http PATCH request on my custom API.
The patch request has the standard format: The If-Match header represents the entity ETag as returned from Business Central and the Query URL must contain the filter by using the primary key field (No in my case).
If the PATCH request succeeded the API returns the new updated entity.
ETAG: PAY ATTENTION!!!
The Etag is updated every time an entity in modified in Business Central. This means the Etags are loaded when the azure function is called and if an user change some field in Bc this Etag is changed too.
In this case the Http PATCH request will be denied because we try to update a record that has changed on ERP and it will return an “Http 409 Conflict” error.
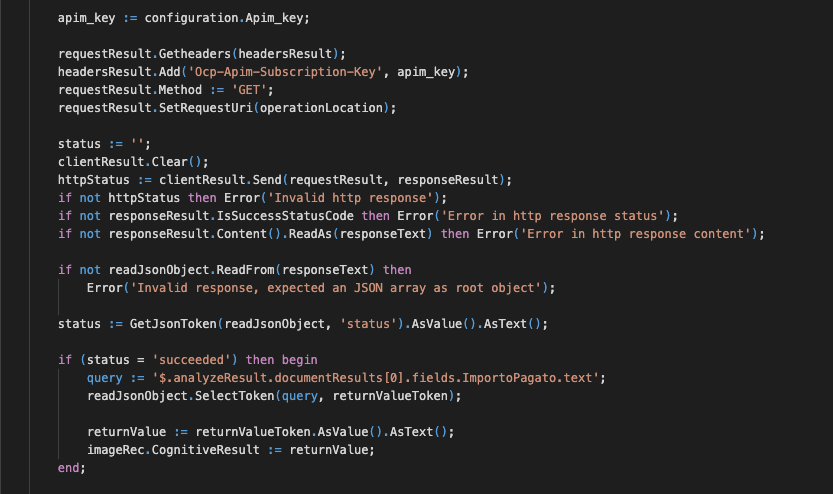
Among all the available features, “Form Recognizer” allows to detect part of a receipt.
At the moment “Form Recognizer”, just out of beta stage, only applies to UK/USA receipts and isn’t yet able to correctly detect grand totals with EU receipts.
This means it’s necessary to train a custom model to get better results.
To create the service is as easy as three mouse clicks: Add Resource, select “Form Recognizer” from list, configure names and location/resource group.
Once the service has been created, under Keys and Endpoints you can find “Key 1” and “Endpoint”, these two strings will be used when configuring Label Tools.
AZURE BLOB STORAGE
I create a blob container on Azure Portal and I upload there all of my receipts by using “Storage Explorer”.
It’s important to enable “Configure cross-domain resource sharing (CORS)” access.
HOW TO CREATE AND TRAIN A CUSTOM MODEL
Since the service by default recognises only US/UK receipts I have to create my own custom model.